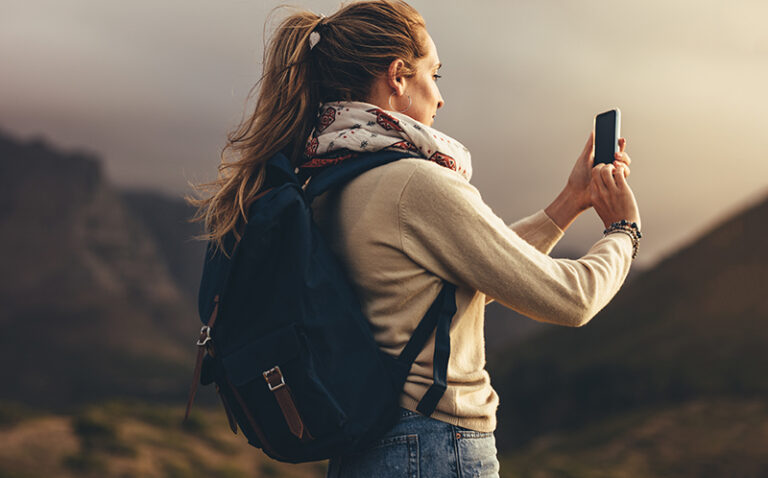
How To Take Good Travel Photos With Your iPhone: 9 Tips For Beginners
Interested in learning how to take good photos with iphone, or any other phone? Keep on reading for some very easy photography tips for beginners.
So many people think that in order to take nice pictures, they need to have the best camera gear. This isn’t true, though.
People can take really great pictures with their phones these days, and there are different techniques that you can implement to make your iPhone pictures look their best. These photography basics can be used on any cell phone, but I’ll be mentioning iPhones mostly just because that’s what I have the most personal experience with.
I keep hearing about people putting off some of their dreams such as starting a blog because they feel like they have to get fancy cameras first, but the truth is, they can start now! Don’t let lack on equipment stop you from your dreams and aspirations, get started now with these iPhone photography basics!

This post may contain affiliate links, which means I may receive a commission, at no extra cost to you, if you make a purchase through a link. Please see my full disclosure for further information.
9 Tips To Take Good Travel Photos With Your iPhone
Try Different Backgrounds
Find out what looks best by trying different backgrounds. If you’re photographing an object, try different backgrounds. You can find some good options through your house such as countertops, cutting boards, floors etc.
See what works the best and go from there. If you’re photographing a person, try taking pictures in different areas to see what looks the best in the background, and by moving around to different areas you might also notice the lighting being better in some areas than others.
Always experiment and you may end up loving something that you hadn’t previously thought of.
Focus
Make sure your image is in focus! This is the ultimate (hopefully obvious) tip for photography basics. If your picture isn’t in focus, 99% of the time can’t do much with it, especially if it’s cell phone quality. To focus on the iPhone, just tap on the screen where you want the photo to be the most clear.
If you’re taking a picture of a person, you want their face in focus. If you’re photographing an item, you want to tap on the item. If you have multiple items or people, focus on an area that’s more central.
Have Good Lighting
Good lighting is probably the most important part of taking pictures (maybe coming in a bit behind a picture needing to be in focus). The lighting for your pictures can be what makes or breaks your image. You don’t need to use a fancy professional light set up by any means.
Taking pictures in natural light through a window often works beautifully. Not only are these tips super important when you’re trying to learn how to take good photos with iPhone, but even when using professional equipment, this is super, super important!
Do Not Use Flash
Flash is awful. It makes an image flat and gives it a very strange color. Please avoid flash if you’re trying to take nice pictures! This is a very important part of the photography basics because it’s something that many people still use, and it’s an easy thing to change immediately.


Lighten Shadows
Sometimes when taking pictures, the shadows may be a bit harsh, which basically means they’re very dark and contrast-y in the picture. To prevent this, if possible try not to take pictures in direct midday sun.
The morning and late afternoon sun is more preferable because the sun isn’t as high in the sky so the shadows are softer. If you do find yourself in a position where your shadows are darker than you’d like, there is a way to brighten them.
You want to do this as you’re taking the pictures, because editing will only get you so far with this, especially on your phone.
When taking a picture you can hold up a reflector. There are professional ones that help to bounce the light back in, but you can just use a white foam board, white poster board, and I’ve even used paper towel for a food picture before (aim for something more solid though!)
You then place this white board or reflector opposite of the shadow out of the shot of the camera and the light that’s causing the shadow will get bounced off of the white board and into the shadow which will brighten it. It’ll make editing later much easier.
Edit On Your Phone
If you’re going to be taking pictures on your phone, you may as well edit on there too. There are some great apps that I love using to edit. My most used editing apps are VSCO, Lightroom, and FaceTune. If you’re interested in seeing a post about how I edit my pictures, let me know in the comments below!
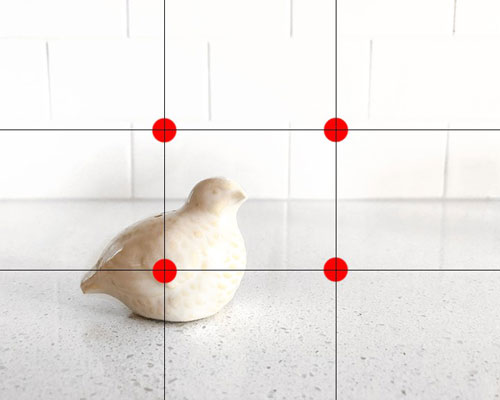
Use Rule of Thirds
The rule of thirds is where the main subject of your image isn’t just in the center of the picture. Sometimes having a person or object in the dead center of an image can make it more powerful, but it’s often more interesting to place your image in the area of thirds.
If you’ve ever noticed a grid on your camera before, that’s what it’s there for. If you want to add it onto your iPhone camera, you can turn it on by going to Settings –> Camera –> Grid On.
Don’t Zoom
When it comes to how to take good photos with iPhone, avoid the zoom function on the iPhone! The zoom on this camera is awful and instantly lowers the quality of your pictures.
If you really need to get in a bit closer, I would actually try to take the picture at a normal distance, then crop it in. I find that sometimes that can be better for the quality of the pictures. But overall, try to get as close as you have to, to take the pictures.
Depth of Field
When taking a picture, if you want to add depth and make the photo more interesting, it helps to have something in the background. Focus on your main person or object in the front, then have something farther back.
This will cause a bit of a blur effect and gives your photo an extra pop. Of course, with professional cameras and lenses, you would get more of a blur effect, but it still works when taking pictures with an iPhone.

So those are some easy photography hacks to help you improve your photography skills using just your phone. I hope these tips helped you learn how to take professional photos with iphone and how to take an aesthetic photo. Did you find these tips helpful? Let me know in the comment section below!
Related Posts
Where To Take Pictures In Las Vegas
Travel The World With A Virtual 3D Tour From Home